Proper driveshaft installation is crucial for vehicle safety and optimal performance. Whether you’re a DIY enthusiast working in your garage or a professional mechanic at a repair shop, mastering driveshaft installation can prevent costly repairs and ensure a smooth driving experience. In this blog post, we’ll share essential tips and in-depth information that cater to both DIY and professional mechanics.
Understanding Driveshaft Installation
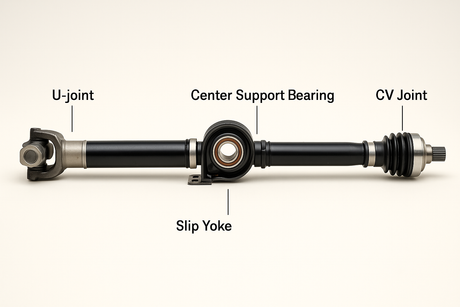
Before diving into the installation tips, let’s understand the role of a driveshaft. The driveshaft, also referred to as a propeller shaft or drive line, transmits torque from the transmission to the differential, which then powers the wheels. A properly installed driveshaft ensures that power is transmitted efficiently, ensuring the smooth functioning of your vehicle.
Top Tips for Driveshaft Installation
1. Gather Necessary Tools and Parts Before commencing the installation, make sure you have all the required tools and components. Essential tools include:
- Wrenches and Sockets: For loosening and tightening bolts.
- Torque Wrench: To ensure bolts are tightened to the manufacturer's specifications.
- Hydraulic Jack and Jack Stands: For safely lifting and securing the vehicle.
- Grease Gun: For lubricating the U-joints.
Using high-quality, OEM (Original Equipment Manufacturer) parts is critical for a dependable installation. OEM parts are designed to fit and function just like the original components.
2. Safety First: Secure the Vehicle Safety cannot be overemphasized. Use a hydraulic jack and jack stands to secure the vehicle. Ensure it is parked on a flat and stable surface to prevent any accidental movements during installation. Wearing safety glasses and gloves can also protect you from potential injuries.
3. Proper Driveshaft Alignment Driveshaft alignment is crucial for preventing vibrations and enhancing performance. Follow these steps:
- Mark Orientation: Mark the orientation of the old driveshaft before removal to ensure the new one is installed in the same position. This helps maintain the balance.
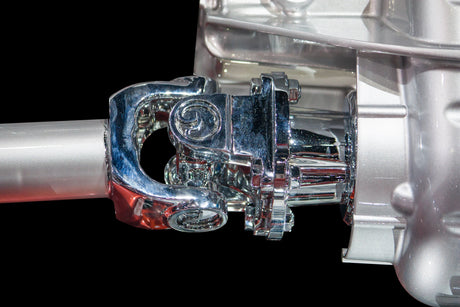
- Align Yoke and Flange: Make sure the driveshaft yoke is properly aligned with the transmission output shaft and the differential input flange. Misalignment can lead to vibrations and accelerated wear.
4. Lubricate Components Correctly Proper lubrication of the U-joints and other moving parts is essential. Use a grease gun to apply the appropriate grease to U-joints as specified by the manufacturer. Consistent lubrication helps prevent premature wear and ensures smoother operation. Make sure not to over-grease, as this can also be detrimental.
5. Accurate Torque Settings Tighten bolts and nuts to the manufacturer’s specified torque settings using a torque wrench. Over-tightening can strip threads, while under-tightening can lead to loose components and potential failures. Always refer to the vehicle’s manual for precise torque specifications.
6. Inspect and Replace Worn Parts Before installing the new driveshaft, inspect related components like the companion flange, U-joints, and carrier bearing for wear. Replace any damaged or worn parts to avoid future complications. Replacing these components as needed can save you from having to disassemble and reassemble the driveshaft later on.
7. Balance the Driveshaft After installation, it’s important to ensure the driveshaft is properly balanced. An imbalanced driveshaft can cause vibrations and additional strain on drivetrain components. If balancing the driveshaft is beyond your capability, consult a professional who can perform this critical procedure.
Common Installation Mistakes to Avoid
Following the best practices is essential, but it’s also important to be aware of common pitfalls:
- Ignoring Manufacturer Instructions: Always follow the specific instructions provided by the driveshaft and vehicle manufacturers. These guidelines ensure compatibility and reliability.
- Skipping the Test Drive: After installation, take the vehicle for a test drive to check for any unusual noises or vibrations. Address any issues promptly to avoid further damage.
- Improper Greasing: Neglecting to properly grease the U-joints can lead to premature failure and potential damage to the drivetrain. Properly maintained lubrication is key for long-lasting performance.
Advanced Tips for Professionals
1. Use Specialized Tools Professionals often have access to specialized tools such as laser alignment systems and balancing machines, which can significantly enhance the precision of driveshaft installation.
2. Offer a Test Drive Option: Providing a test drive option for customers can help ensure that the installation is thoroughly tested, giving both you and your customers confidence in the quality of the service provided.
3. Regular Training and Updates Stay updated with the latest advances in driveshaft technology and installation techniques
to ensure your skills remain sharp and up-to-date. Attend workshops, webinars, and read industry publications to stay informed about the latest best practices in driveshaft installation and maintenance.
Practical Tips for DIY Enthusiasts
1. Take Your Time Rushing through the installation process increases the likelihood of making mistakes. Allocate ample time to focus on each step methodically.
2. Document Your Work Taking pictures or notes during the disassembly process can be incredibly helpful when it’s time to reassemble components. This is especially useful for first-time installers who might not be familiar with every part.
3. Use Reliable Sources of Information While video tutorials and online forums can be invaluable resources, always cross-reference the information with reliable sources such as the vehicle’s service manual or manufacturer guidelines.
Advanced Troubleshooting
1. Identifying and Fixing Vibrations Even after careful installation, vibrations can sometimes occur. Common causes include:
- Imbalance in the driveshaft components: Check if the driveshaft is properly balanced.
- Worn U-joints: Even if lubricated, old U-joints might need replacing.
- Misalignment: Recheck the alignment between the driveshaft and differential.
2. Checking for Unusual Noises Listen for any clunking or clicking sounds, which can indicate issues like:
- Loose bolts or nuts: Ensure that all bolts and nuts are tightened according to specifications.
- Damaged companion flange: Inspect and replace if necessary.
Customer Education for Repair Shops
For professional repair shops, customer education is important. Explain to your clients the importance of a well-installed driveshaft and what they can do to maintain it. Offer a brief overview of the installation process to show transparency and build trust.
Conclusion
Proper driveshaft installation is fundamental for ensuring your vehicle’s safety and performance. Whether you’re a DIY enthusiast or a professional at a repair shop, following these tips and avoiding common mistakes will help you achieve a smooth and reliable driveshaft installation. Taking the time to gather the right tools, ensure proper alignment, and lubricate components correctly can make a significant difference.
For professionals, leveraging specialized tools and staying updated with industry advancements can further enhance the quality of your installations. For DIY enthusiasts, patience, thorough documentation, and reliable sources of information can turn a complex task into a manageable project.
If you have any doubts or encounter persistent issues, consulting with an experienced mechanic can save you from potential headaches down the line. Remember, your driveshaft plays a key role in your vehicle’s operation, so taking the time to install it correctly is well worth the effort.
Happy driving!


